For the person who wants everything....
Atari 2600
Nintendo Entertainment System (8-bit)
Microsoft Xbox
Nintendo GameCube
Sony PlayStation 2
A custom PC
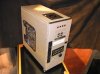
Lian-Li PC-76 case
Microsoft Xbox
Sony PlayStation 2
Nintendo GameCube and an 8-bit Nintendo
Atari 2600 jr
Epox 8K3A+ mobo
AMD XP 2100+ CPU
ATI Radeon All-In-Wonder 8500DV video card
Kingston PC2700 333-MHz DDR RAM 512MB
Intel Pro/100 NIC
Six-position nine-pin switch box
14 various toggle switches
TDK 16/10/40 CD-RW drive
Seagate 40GB HD
Thermaltake Volcano 7+ CPU heat sink, also Thermaltake active and passive memory coolers
Various bolts, nuts, zip ties, heat shrink tubing, plastic sheeting, and other hardware
Time to start cutting and soldering. You know, the fun part -- power toys... er, I mean tools. Remember to wear eye protection, and try to have someone help you.
Cut out the top of the case for the GameCube. I carefully measured the GameCube and marked the top of the case with tape. Remember that when the lid opens, you need extra room for the lid to clear.
I used a cut-off wheel on the Dremel and carefully followed the masked lines. Once the straights were done, I drilled the corners to finish the cut and then used a file to clean up the sides and corners.
Cut out a hole for the power outlet. This should be in the rear of the machine, as the other cords will be attached here, and the power supplies are central to the rear of the machine.
Cut out a hole for the AV plugs. I placed this in the rear of the machine close to the other connectors so it will look like it is supposed to be there.
Cut holes for the GameCube controllers in a blank 5.25-inch drive bay cover. I used the stock cover from the GameCube as a template to mark the blank drive bay cover. I then drilled a pilot hole and used the Dremel to enlarge the holes so that they would be exactly the size of the controller ports.
Cut holes for the Xbox controllers in a blank 5.25-inch drive bay cover. Both sets of controller ports were glued together before this so I could use them as a template to cut out the opening. After the opening was cut out and shaped with a file, I drilled the mounting hole through the controller port block and the bay cover for the mounting screws.
Cut a hole for the Xbox DVD in a blank 5.25-inch drive bay cover. This was measured and cut out without a template. It is a straightforward layout, and the face of the tray overlaps and will cover up any variation in the opening.
Cut holes for the Xbox eject button and power button in the front cover of the Boxx case. I chose to mount them next to the main PC power buttons. I also aligned them to maintain the pleasing visual layout.
Make a mounting plate for the Xbox mobo. The Xbox mobo will be mounted side-by-side with the PC mobo. The AV connector needs to clear the PC mobo, so I used a raised mounting plate.
Drill holes for the mounting plate and power supply. I laid the mounting base on the plate in the case and marked the holes, then drilled them outside of the case.
Cut out the front panel for the PS2. Be accurate with your measurement, because this is in the most visible part of the Boxx and it can't be undone.
Cut out the side panels for Nintendo, Atari, and window. Again, measure carefully and multiple times. Remember the old saying: "Measure twice, cut once."
Mod the Xbox components
Cut out the base of the Xbox for mobo mount.
Cut out the base for power supply mount.
Cut extra material off of the DVD drive.
Extend the wiring for game controller ports, DVD connector, power/eject buttons, and hard-drive power.
Glue two Xbox controller ports together and mount in the 5.25-inch cover.
Glue the 5.25-inch cover to the DVD drive.
Solder AV wire onto breakout panel.
Solder power supply power lead.
Mod GameCube components
Solder power supply lead.
Mount controller in 5.25-inch cover after GameCube is installed in case (space constraint).
Sand thickness of GameCube case.
Remove front and rear covers.
Mod the PlayStation 2
Solder power and eject switch leads.
Make mounting bracket.
Cut out front face of PS2 for use on front case panel.
Mod the 8-bit Nintendo
Open it and use the standard mounting posts for mounting in the new case.
Carefully measure the required height and cut the post accordingly.
Use epoxy, marine glue, or some other kind of high-strength adhesive to glue these in position on the sides of the drive bay. Make sure to leave access so you will be able to get drives in and out of the bays.
Atari mods
Not too much needed in my case:
Rewire the reset and select switches.
Power supplies
Since I had a few of these, I figured it would look cool to open them up so you could see all the parts. I used a marine adhesive to glue them in place next to the Atari. Be careful here to insulate them from transmitting power to the chassis -- we don't want a really bad hazard.
Atari 2600
Nintendo Entertainment System (8-bit)
Microsoft Xbox
Nintendo GameCube
Sony PlayStation 2
A custom PC
Lian-Li PC-76 case
Microsoft Xbox
Sony PlayStation 2
Nintendo GameCube and an 8-bit Nintendo
Atari 2600 jr
Epox 8K3A+ mobo
AMD XP 2100+ CPU
ATI Radeon All-In-Wonder 8500DV video card
Kingston PC2700 333-MHz DDR RAM 512MB
Intel Pro/100 NIC
Six-position nine-pin switch box
14 various toggle switches
TDK 16/10/40 CD-RW drive
Seagate 40GB HD
Thermaltake Volcano 7+ CPU heat sink, also Thermaltake active and passive memory coolers
Various bolts, nuts, zip ties, heat shrink tubing, plastic sheeting, and other hardware
Time to start cutting and soldering. You know, the fun part -- power toys... er, I mean tools. Remember to wear eye protection, and try to have someone help you.
Cut out the top of the case for the GameCube. I carefully measured the GameCube and marked the top of the case with tape. Remember that when the lid opens, you need extra room for the lid to clear.
I used a cut-off wheel on the Dremel and carefully followed the masked lines. Once the straights were done, I drilled the corners to finish the cut and then used a file to clean up the sides and corners.
Cut out a hole for the power outlet. This should be in the rear of the machine, as the other cords will be attached here, and the power supplies are central to the rear of the machine.
Cut out a hole for the AV plugs. I placed this in the rear of the machine close to the other connectors so it will look like it is supposed to be there.
Cut holes for the GameCube controllers in a blank 5.25-inch drive bay cover. I used the stock cover from the GameCube as a template to mark the blank drive bay cover. I then drilled a pilot hole and used the Dremel to enlarge the holes so that they would be exactly the size of the controller ports.
Cut holes for the Xbox controllers in a blank 5.25-inch drive bay cover. Both sets of controller ports were glued together before this so I could use them as a template to cut out the opening. After the opening was cut out and shaped with a file, I drilled the mounting hole through the controller port block and the bay cover for the mounting screws.
Cut a hole for the Xbox DVD in a blank 5.25-inch drive bay cover. This was measured and cut out without a template. It is a straightforward layout, and the face of the tray overlaps and will cover up any variation in the opening.
Cut holes for the Xbox eject button and power button in the front cover of the Boxx case. I chose to mount them next to the main PC power buttons. I also aligned them to maintain the pleasing visual layout.
Make a mounting plate for the Xbox mobo. The Xbox mobo will be mounted side-by-side with the PC mobo. The AV connector needs to clear the PC mobo, so I used a raised mounting plate.
Drill holes for the mounting plate and power supply. I laid the mounting base on the plate in the case and marked the holes, then drilled them outside of the case.
Cut out the front panel for the PS2. Be accurate with your measurement, because this is in the most visible part of the Boxx and it can't be undone.
Cut out the side panels for Nintendo, Atari, and window. Again, measure carefully and multiple times. Remember the old saying: "Measure twice, cut once."
Mod the Xbox components
Cut out the base of the Xbox for mobo mount.
Cut out the base for power supply mount.
Cut extra material off of the DVD drive.
Extend the wiring for game controller ports, DVD connector, power/eject buttons, and hard-drive power.
Glue two Xbox controller ports together and mount in the 5.25-inch cover.
Glue the 5.25-inch cover to the DVD drive.
Solder AV wire onto breakout panel.
Solder power supply power lead.
Mod GameCube components
Solder power supply lead.
Mount controller in 5.25-inch cover after GameCube is installed in case (space constraint).
Sand thickness of GameCube case.
Remove front and rear covers.
Mod the PlayStation 2
Solder power and eject switch leads.
Make mounting bracket.
Cut out front face of PS2 for use on front case panel.
Mod the 8-bit Nintendo
Open it and use the standard mounting posts for mounting in the new case.
Carefully measure the required height and cut the post accordingly.
Use epoxy, marine glue, or some other kind of high-strength adhesive to glue these in position on the sides of the drive bay. Make sure to leave access so you will be able to get drives in and out of the bays.
Atari mods
Not too much needed in my case:
Rewire the reset and select switches.
Power supplies
Since I had a few of these, I figured it would look cool to open them up so you could see all the parts. I used a marine adhesive to glue them in place next to the Atari. Be careful here to insulate them from transmitting power to the chassis -- we don't want a really bad hazard.

")